
|
2/11/2015 0 Comments Cutting boards complete!Here's a couple of matching cuttingboard made of predominantly maple with a strip of walnut burl. They are finished with Watco Butcher Block oil which is a chemical alternative to mineral oil and beeswax. These boards have different purpose and I can't wait to show you what will happen with them soon. They turned out really awesome and I'm happy to get them out to a great home and even better customer! Thanks for checking out my work! 
0 Comments
2/11/2015 0 Comments Important Date Blocks!Hi Everyone, The days are drawing nearer to the birth of our daughter and my wife and I are very excited! She found a photo of important date blocks and asked me to make some up. I had a bunch of 2x6 spruce scraps laying around the shop so I put them to good use rather than committing them to the firewood pile. 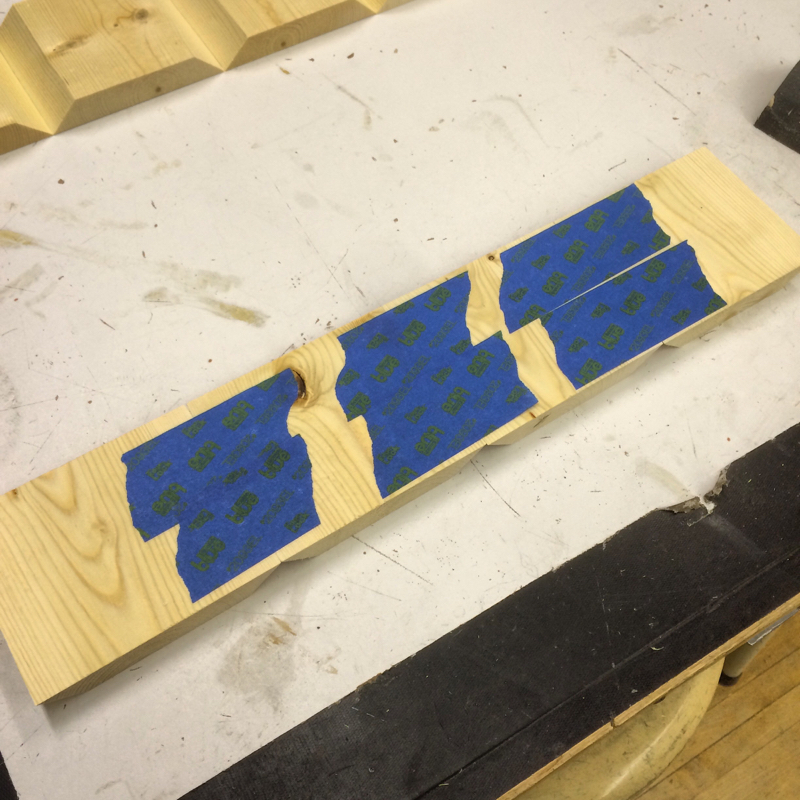
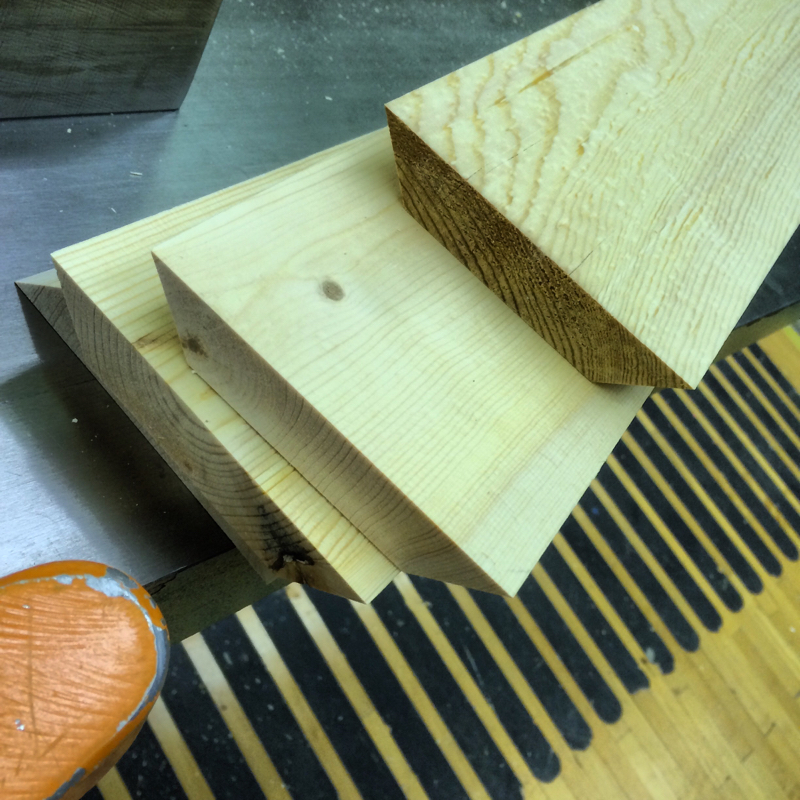
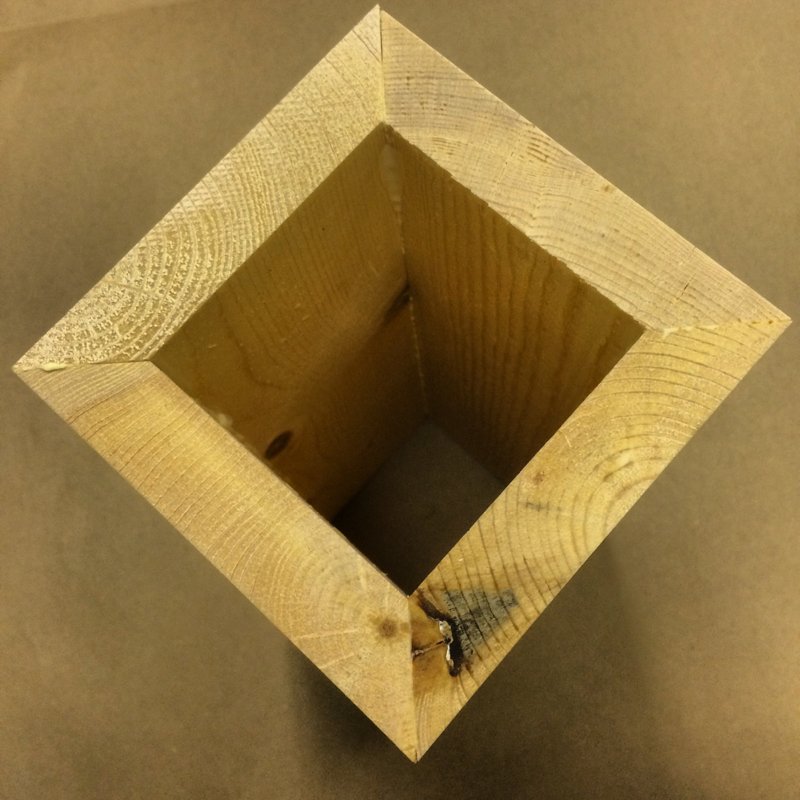
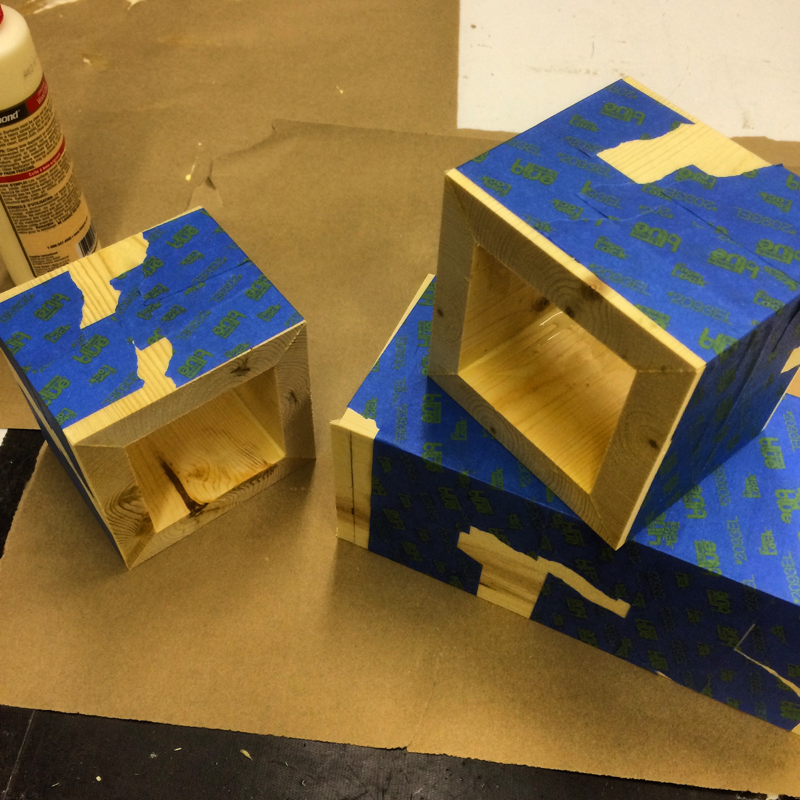
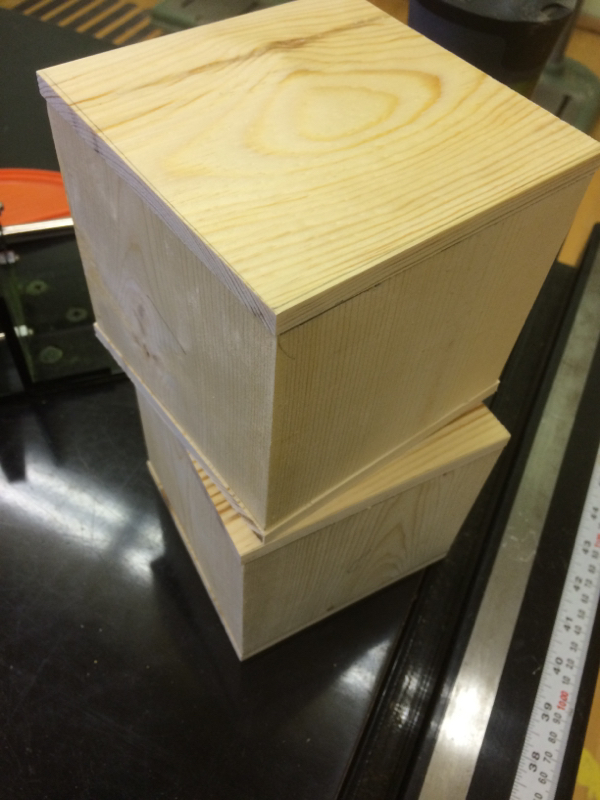
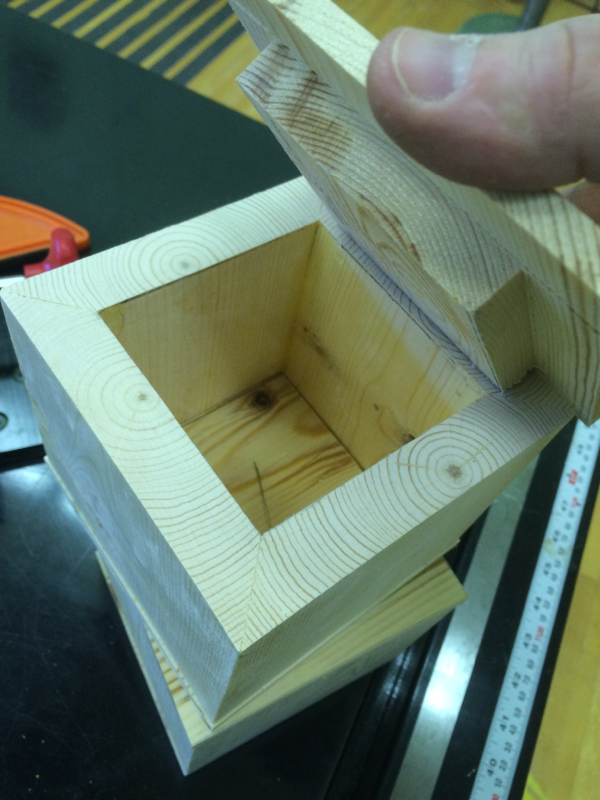
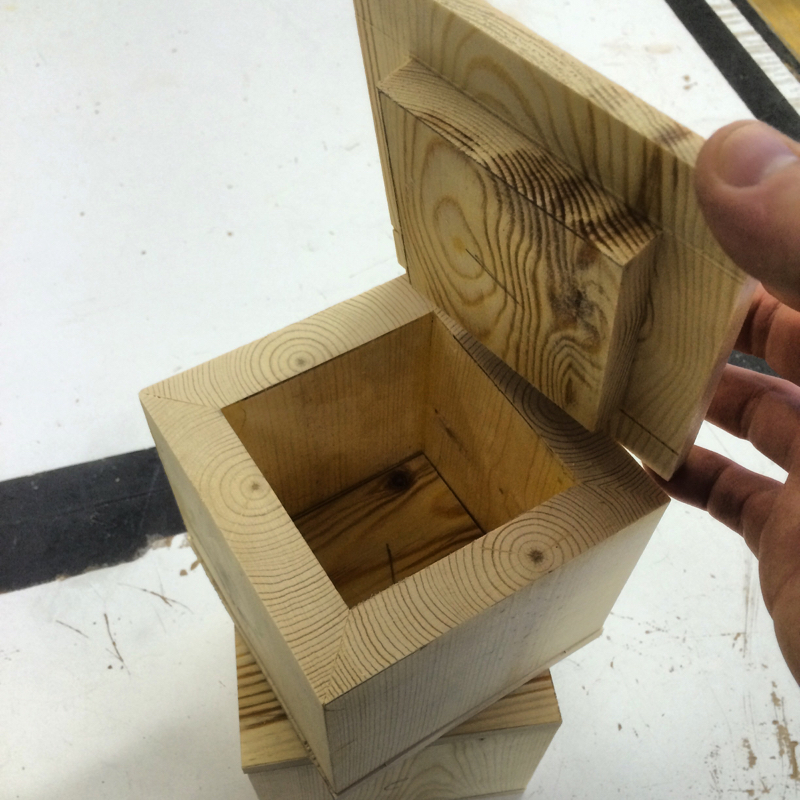
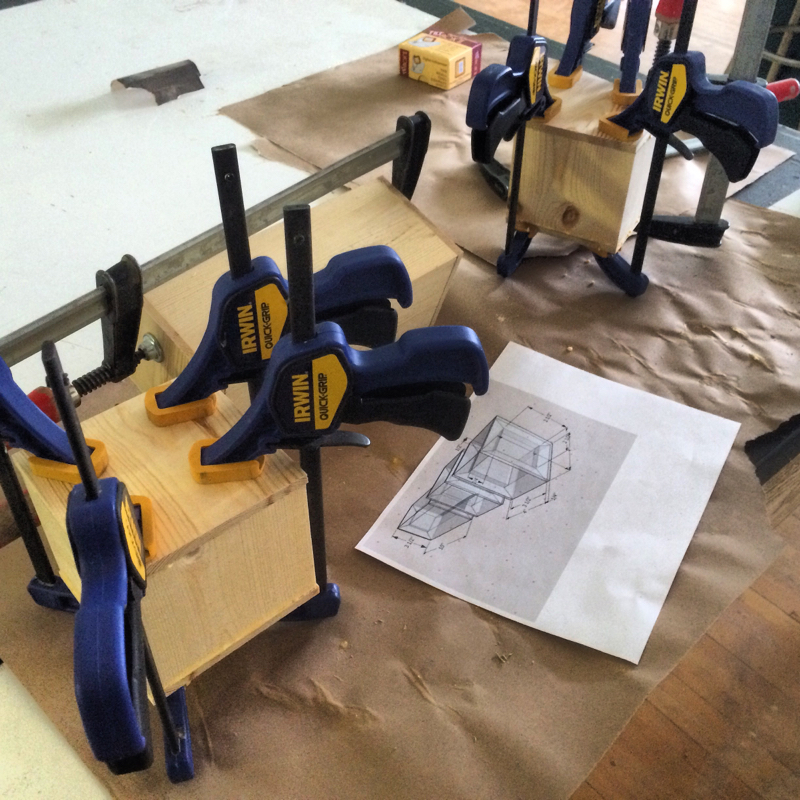
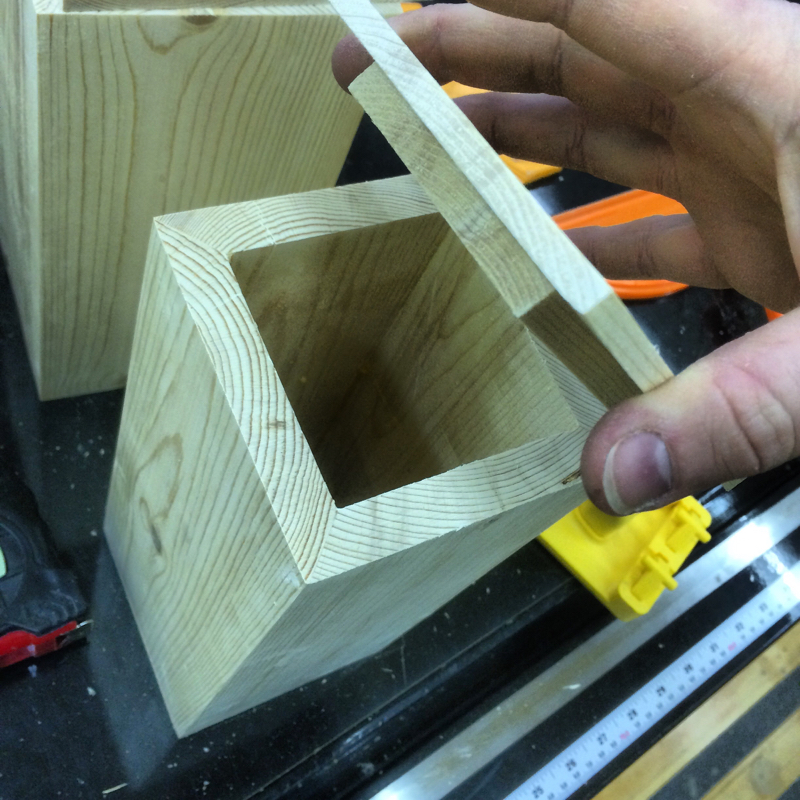
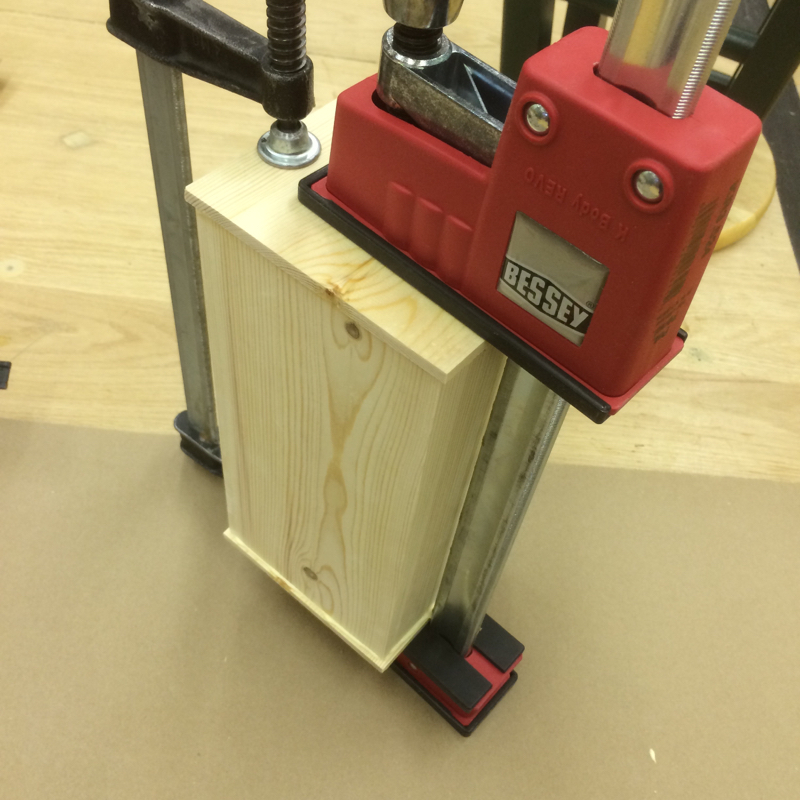
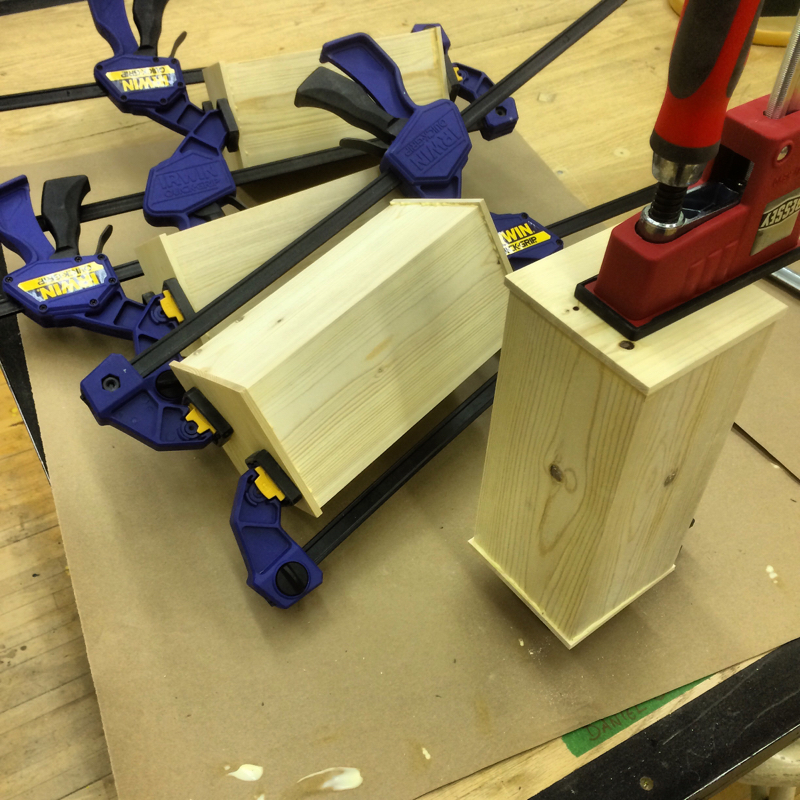
I made a mitred box shape for each cube and then cut plugs to fill and cover the ends of each. This is a good practice for building you mitre skills and taping the joints is a real bonus to getting even pressure on the joints while the glue dries. I'll sand them today and get all of the plugged sides even before I start to plan out lettering and number layout. Thanks for checking out my work! Much more to come in 2015!!! 2/10/2015 0 Comments Wide blocks in bulk!Today I was able to plug the ends of the wide boxes with a half lap joint piece. This process turned out really well. And all of the ends are glued and drying tonight. 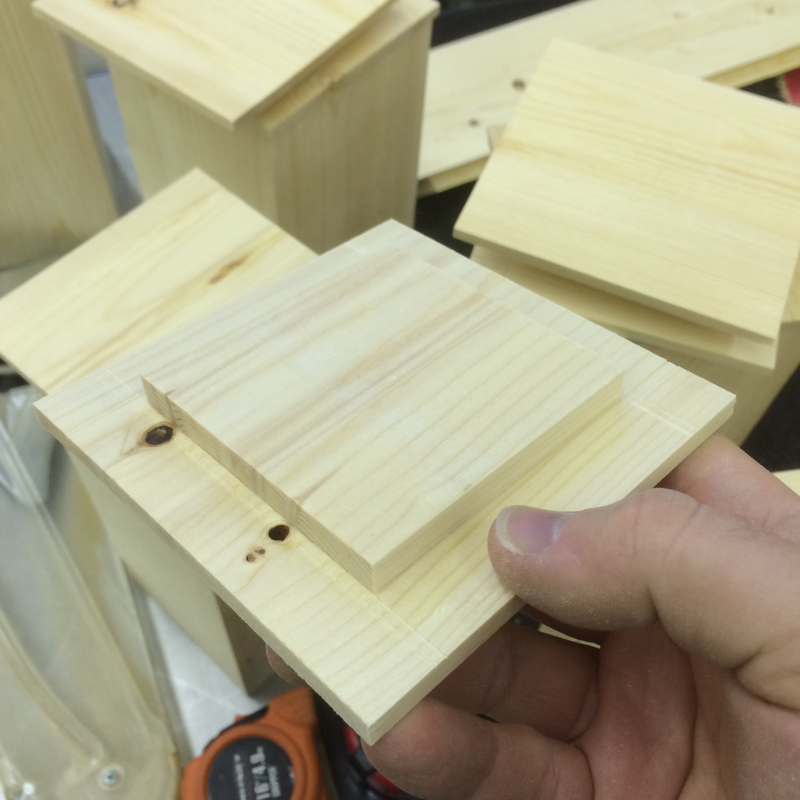
Thanks for checking out my work! I'm excited to get these projects finished and into great homes! 1/3/2015 0 Comments Mineral Oil and/or Bees WaxHi everyone, Just a reminder to all wooden cutting board owners to remember to apply a coat of mineral oil to your clean and dry board. That way you maintain your cutting board's ability to prevent bacteria absorption into the inner fibers of the board. This should be done whenever you see dry spots in the board or every month or two. I put a heavy coat of mineral oil on my board and then after leaving it to dry for a day or two, I then apply a thin coat of Clapham's Mineral Oil/Bees Wax mixture to give the board a great sheen and smell. Mineral Oil is inexpensive and can be purchased at your local pharmacy. Remember to wash your board only by hand and dry it promptly. That way the cutting board should out live us all! Thanks for supporting my work! 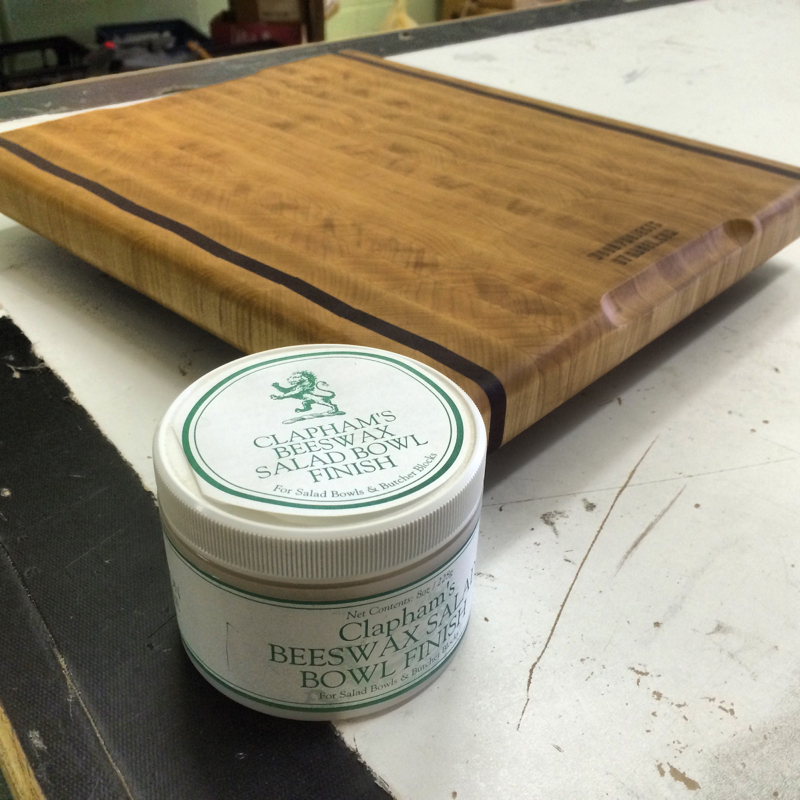
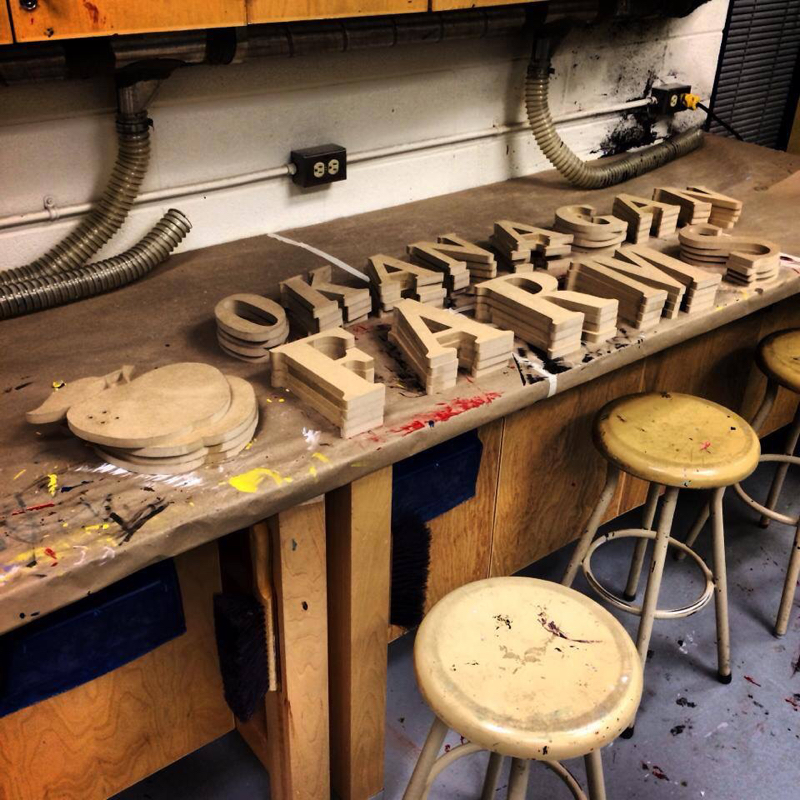
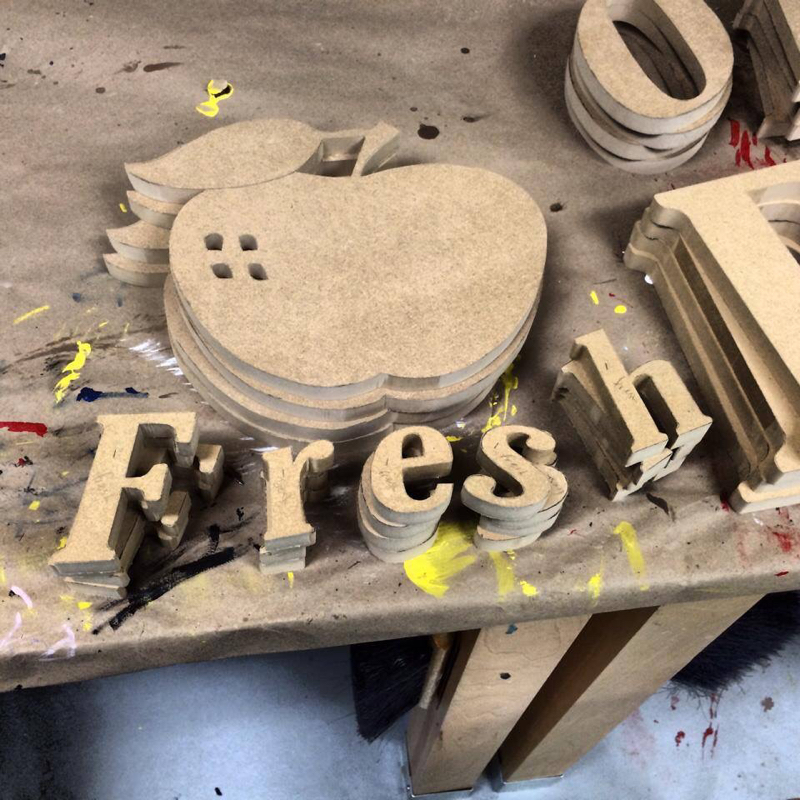
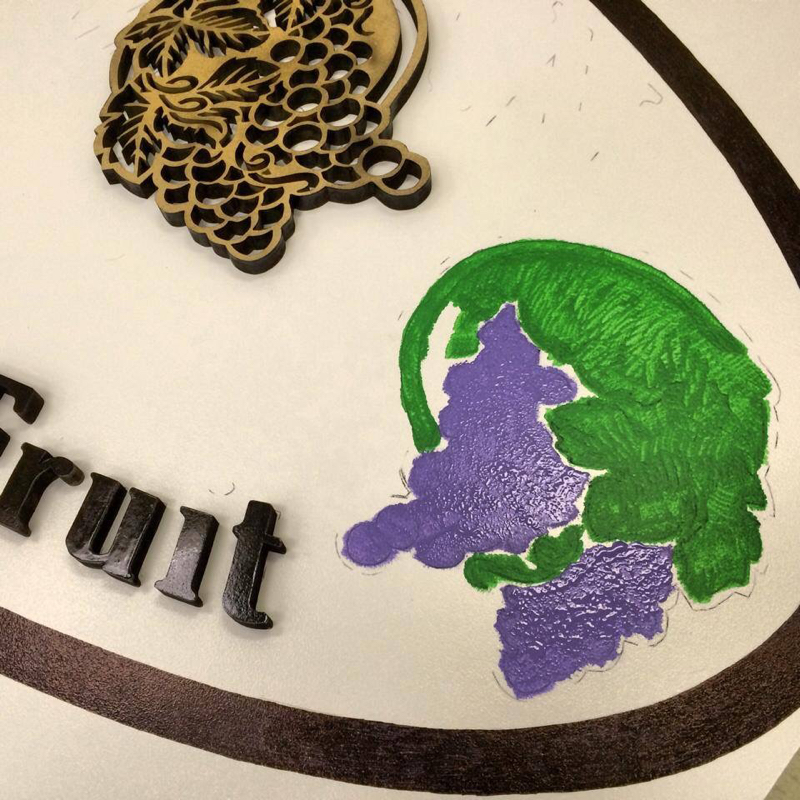
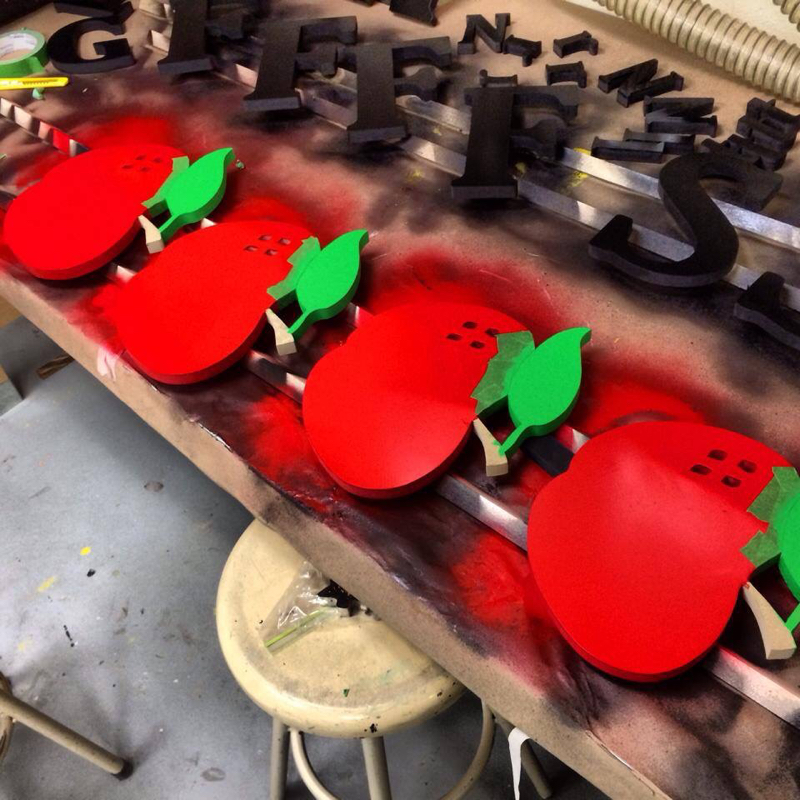
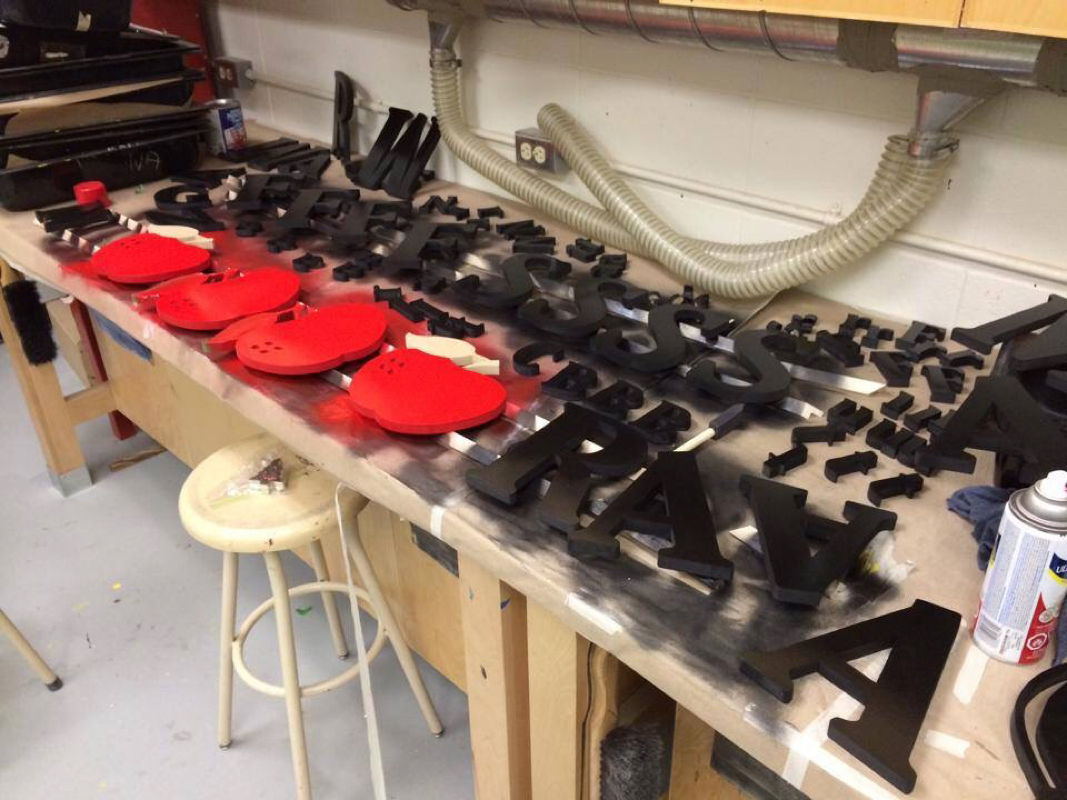
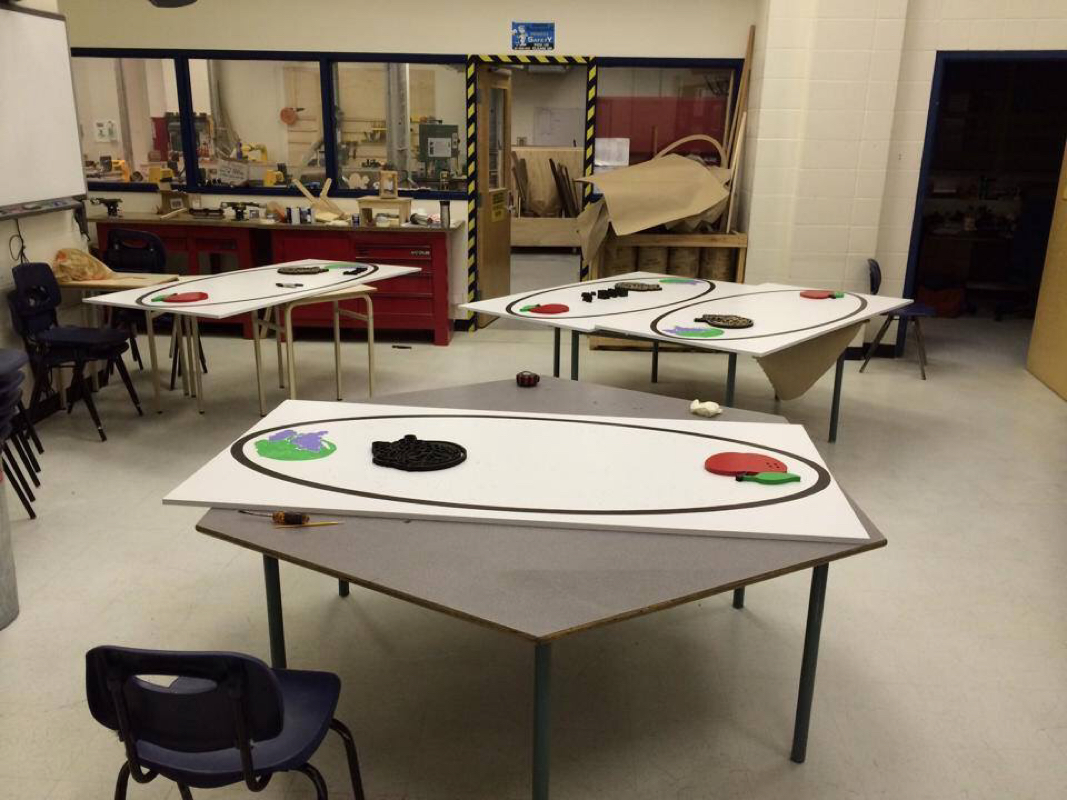
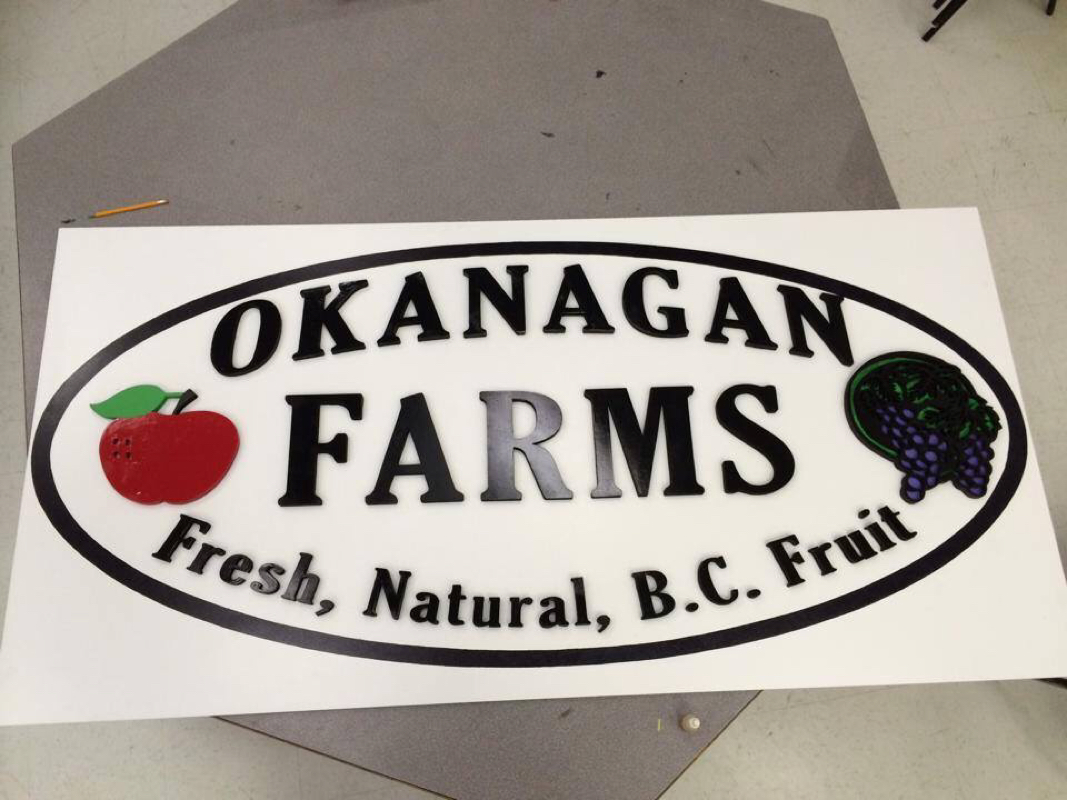
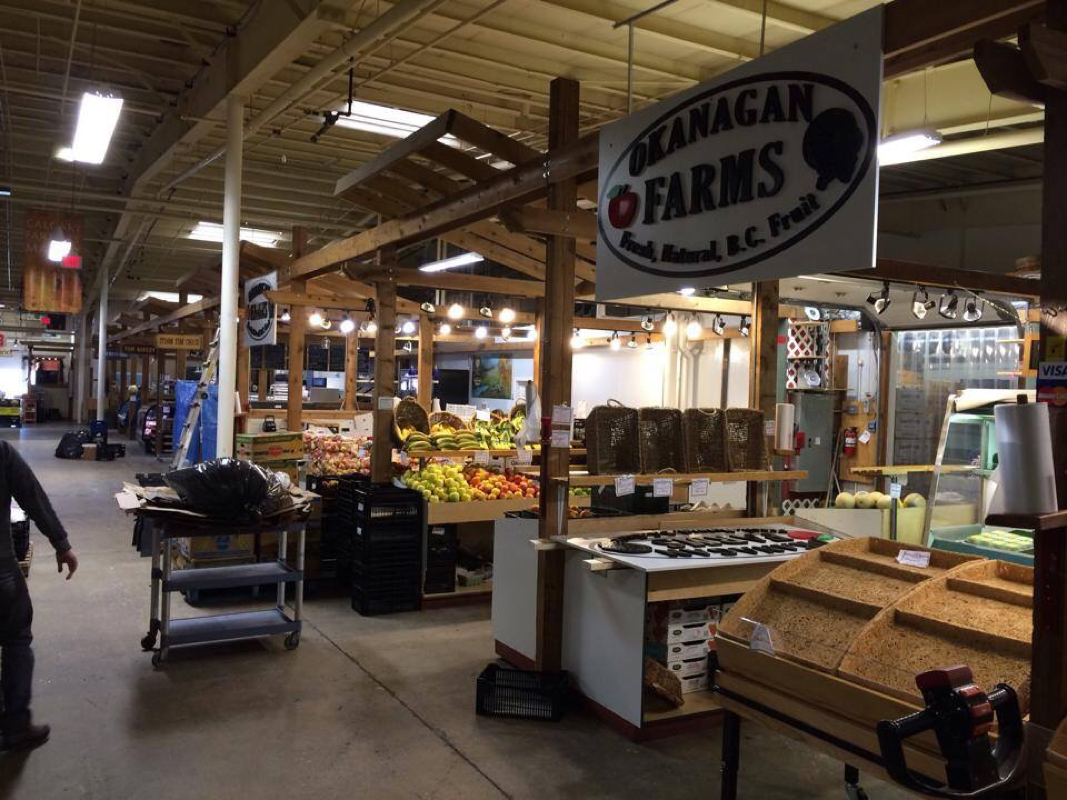
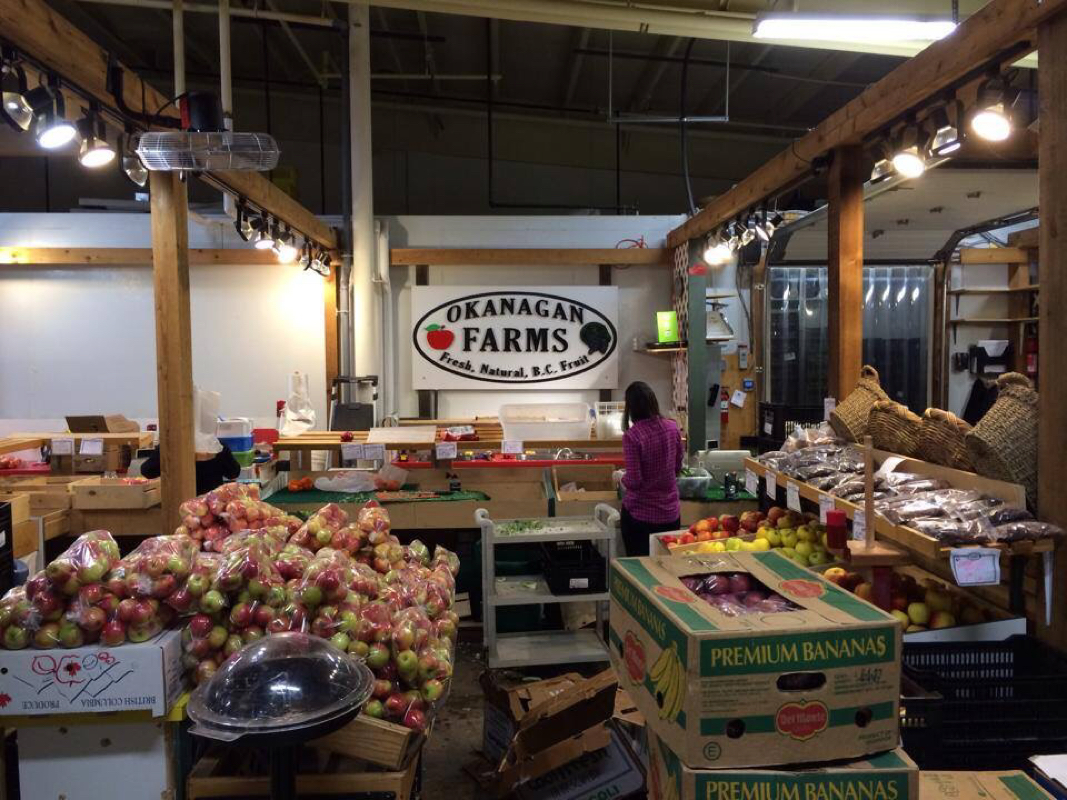
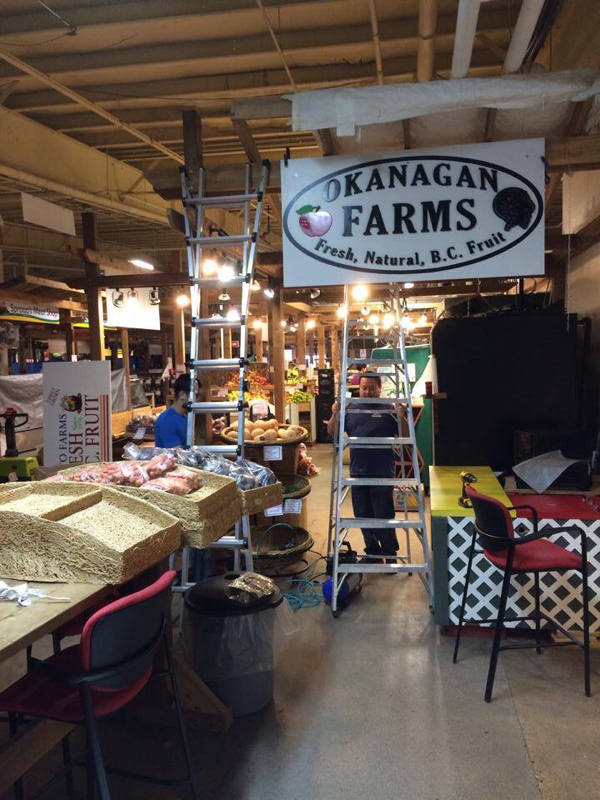
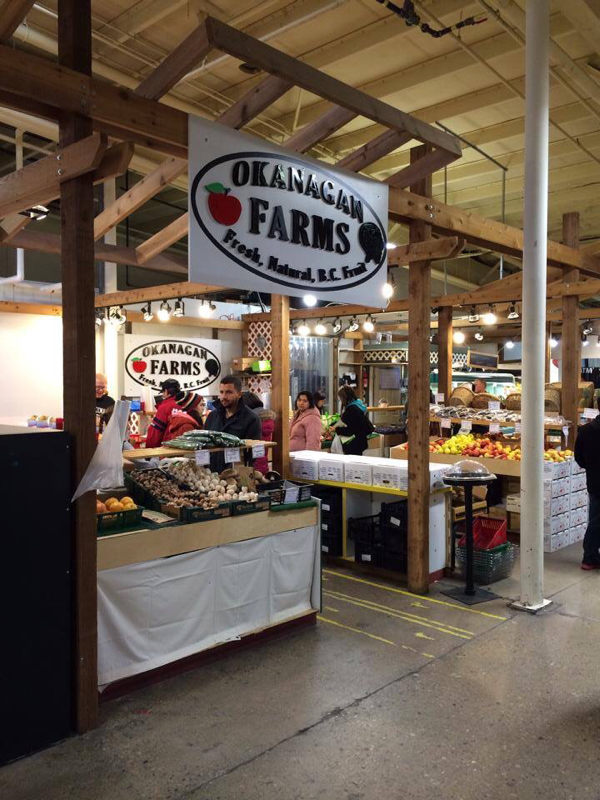
Hi Everyone, Here's a video I made that is a time lapse of the Maple Trojan sign that I carved. Enjoy! Happy New Year from my family to you and yours. 1/1/2015 0 Comments Biggest project of 2014!Hi Everyone, I forgot to post progress photos of the Okanagan Farms Signs that I was commissioned to do last year. So here's some photos of the process. I hope your New Year's Eve festivities were awesome regardless of what you did! Enjoy! 

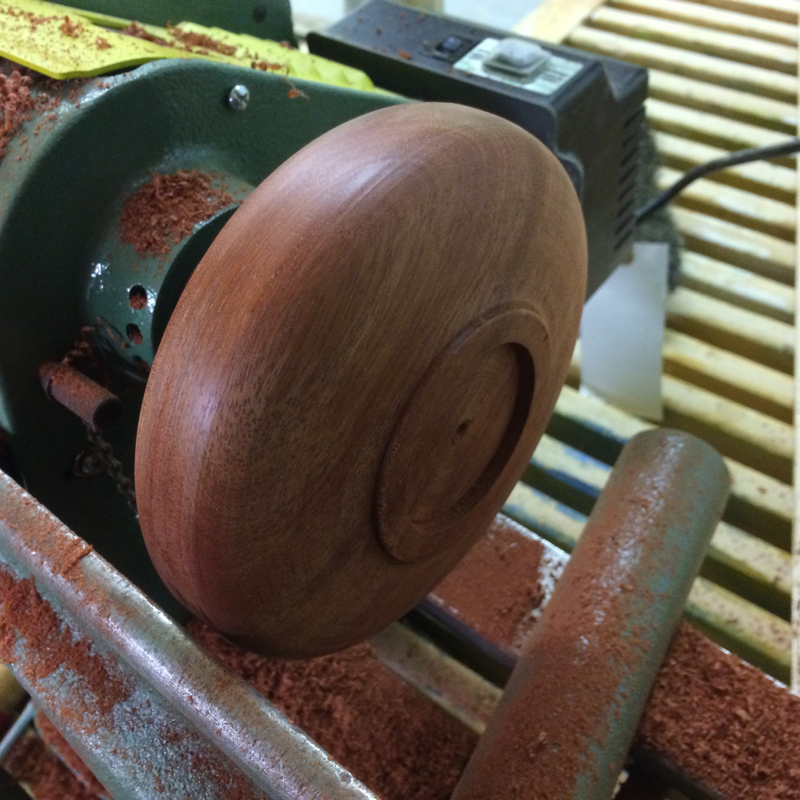
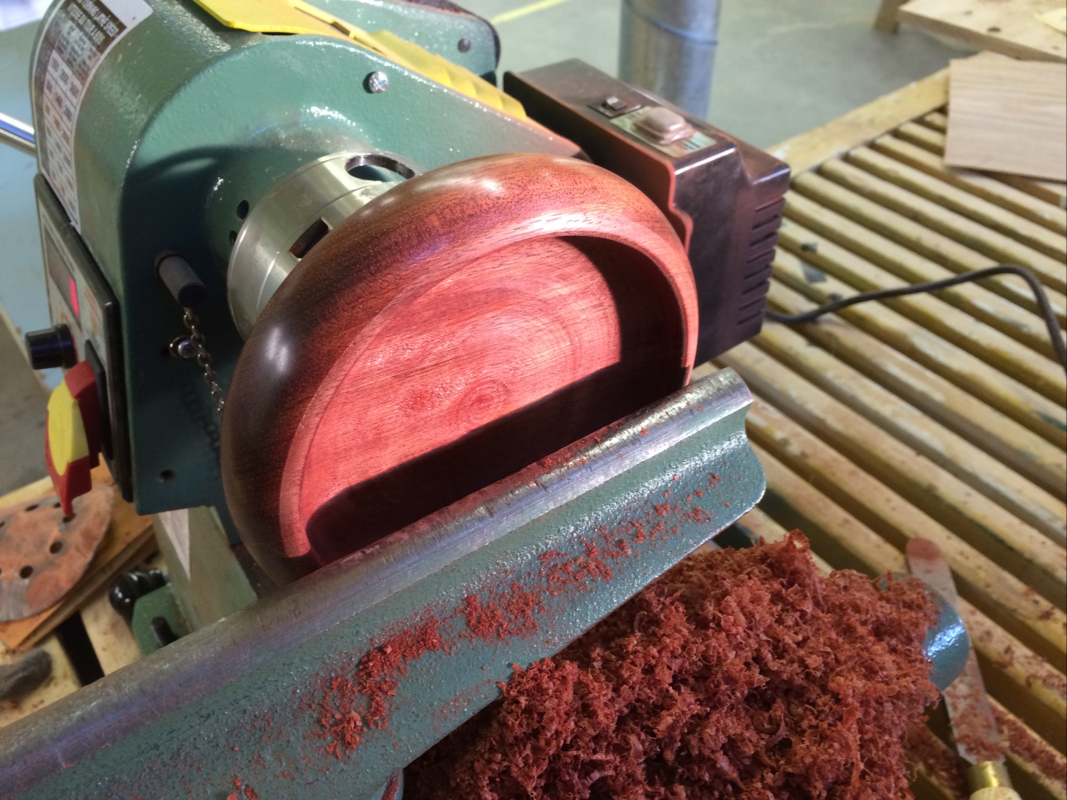
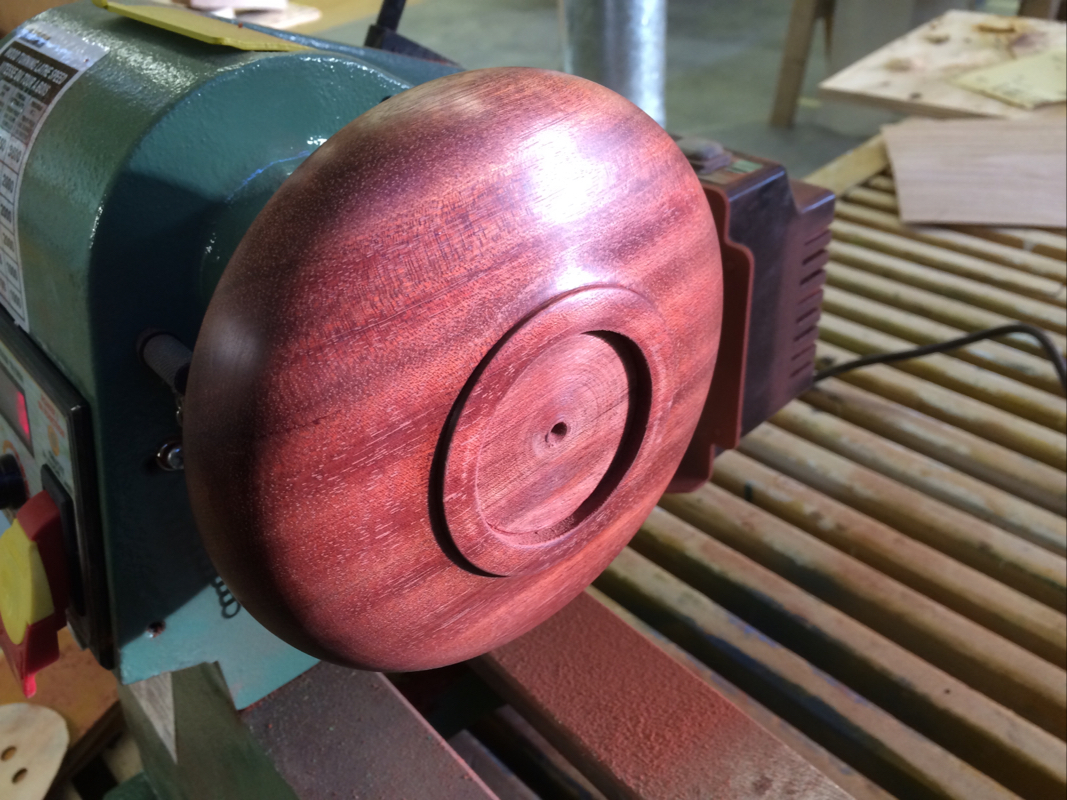
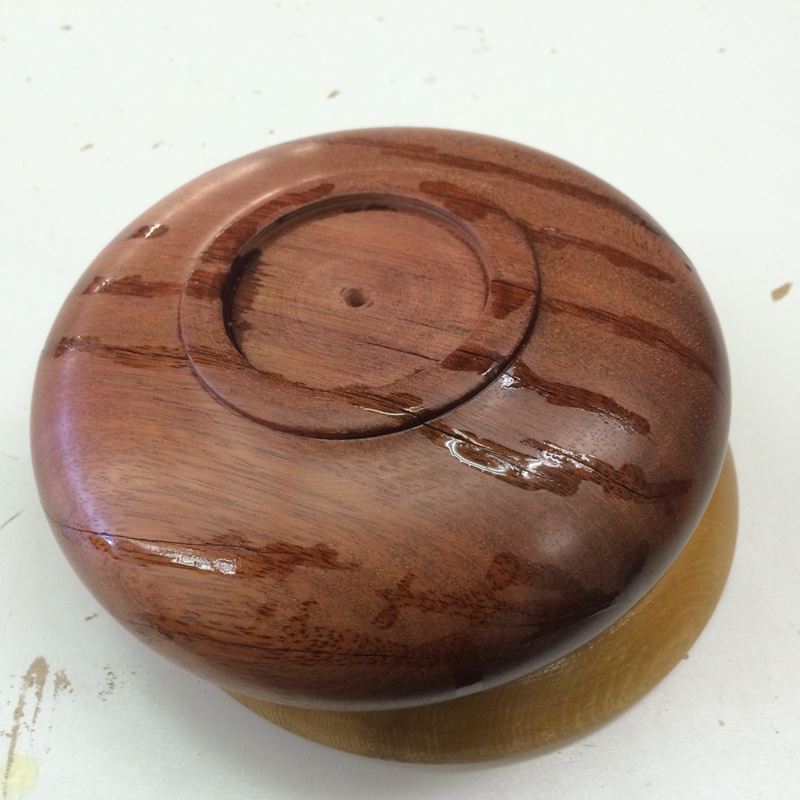
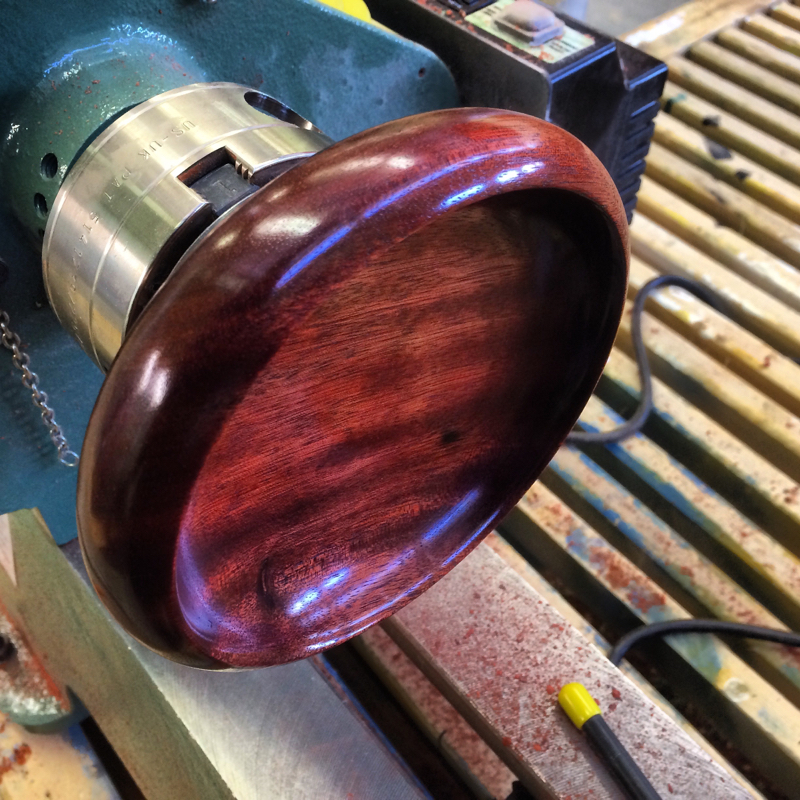
12/28/2014 0 Comments Bloodwood Bowl for my DadHey Everyone, Here's a bowl I turned out of Bloodwood I found at an exotic lumber store in town. This material has a really distinct grain pattern and defined color. The downside to using this lumber species in my climate is that while taking a break between turning sessions, the material expands and contracts drastically. I had to put cyanoacrylate glue in all of the cracks and the bowl came out of round a country Le of times which was difficult to work with. In the end, I got it trued up, sanded down and finished with some Tung oil that gave it a great sheen! My dad really likes it and I'm glad to have made this one of a kind bowl as I won't bring myself to work with this bloodwood species again hopefully. Thanks for checking out my work! 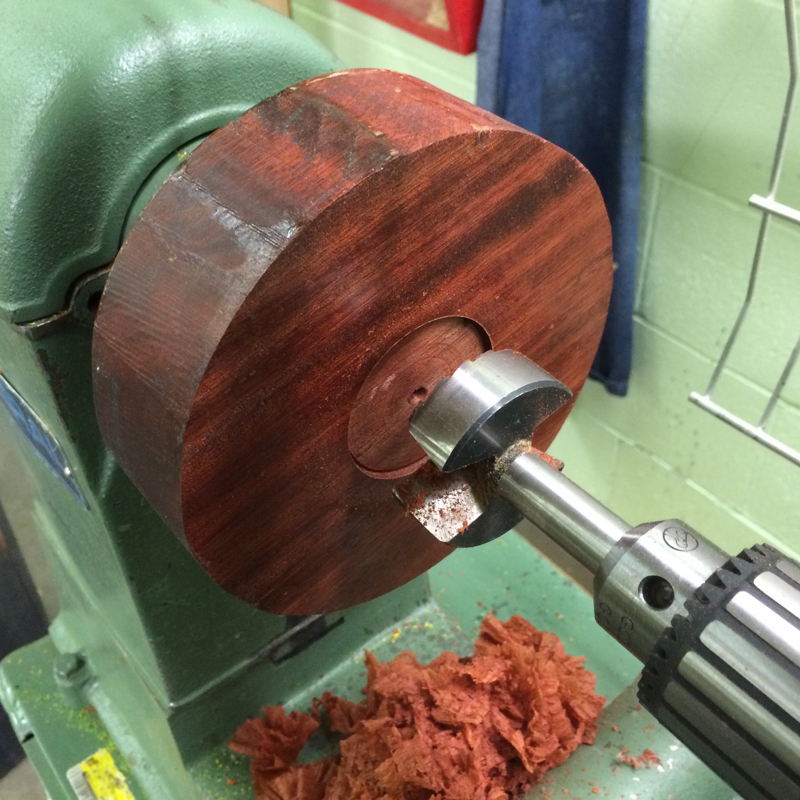
12/23/2014 0 Comments Once A Trojan, Always A Trojan.Hi everyone, Here's what I've been working on this past weekend. It's a maple panel that I glued up a long time ago and I worked on a digital design for awhile before deciding on this layout. I photoshopped a Trojan helmet I found online and tweaked the design to work with my Dremel bit sizes. Yes, I dremeled the whole design out which took awhile but I think it looks pretty great! I painted the carving with acrylic paint and then sanded the design to give it a crisp edged. 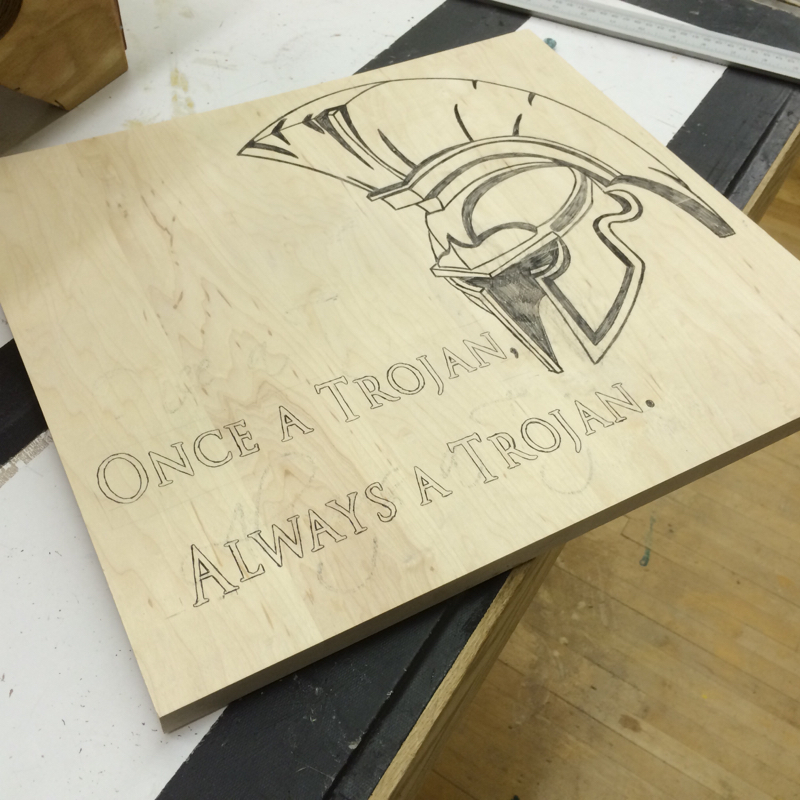
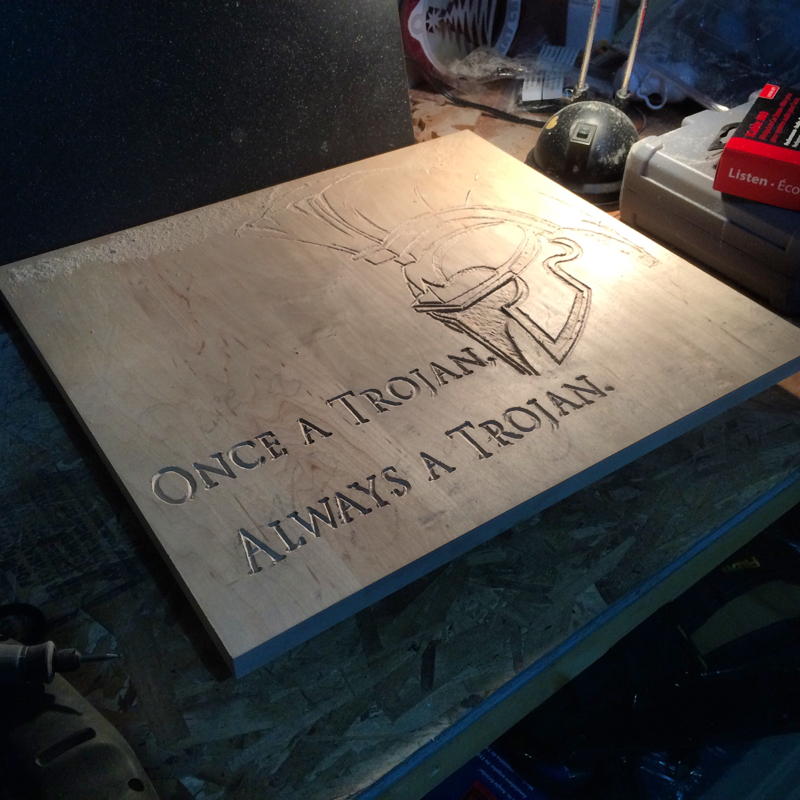
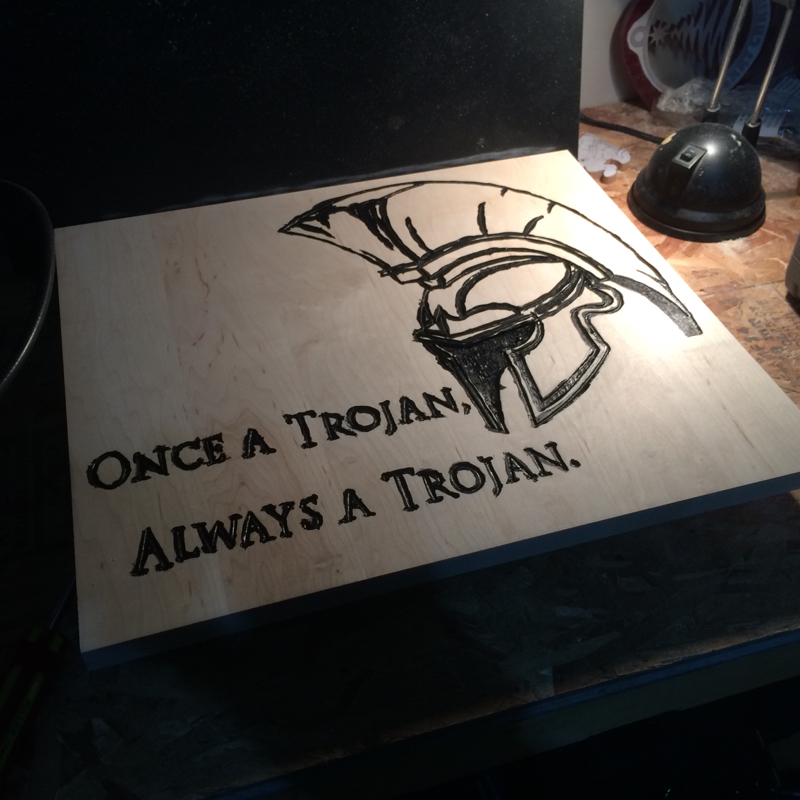
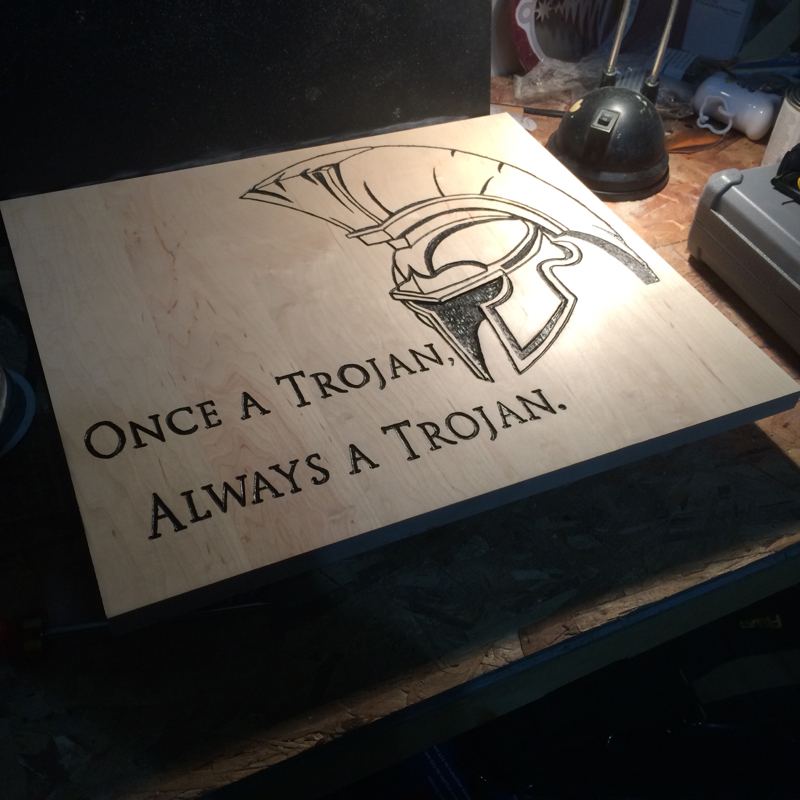
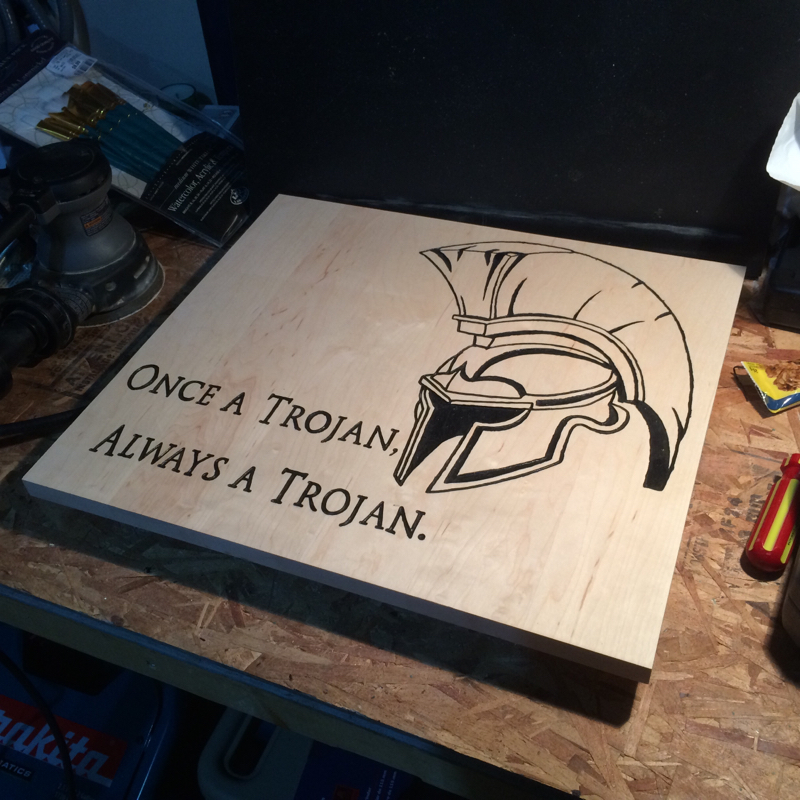
All that's left is some routing of the edges and to apply a clear coat of something awesome to protect the wood. Thanks for checking out my work! Merry Christmas and Happy Holidays to everyone! 12/21/2014 0 Comments Christmas Candle StandHi everyone, I just finished a live edge birch log candle stand for my house i think unless someone wants to purchase it. I cut this log chunk over a month ago to see if I could use it in my apple trophies and as you saw before, I'm glad I didn't use it for trophies. This birch came from my grandmother's back yard tree that was cut down over a year ago now. With a ton of sanding to accentuate the grain, I put a couple of coats of wipe on polyurethane on all surfaces to protect them and it's done! 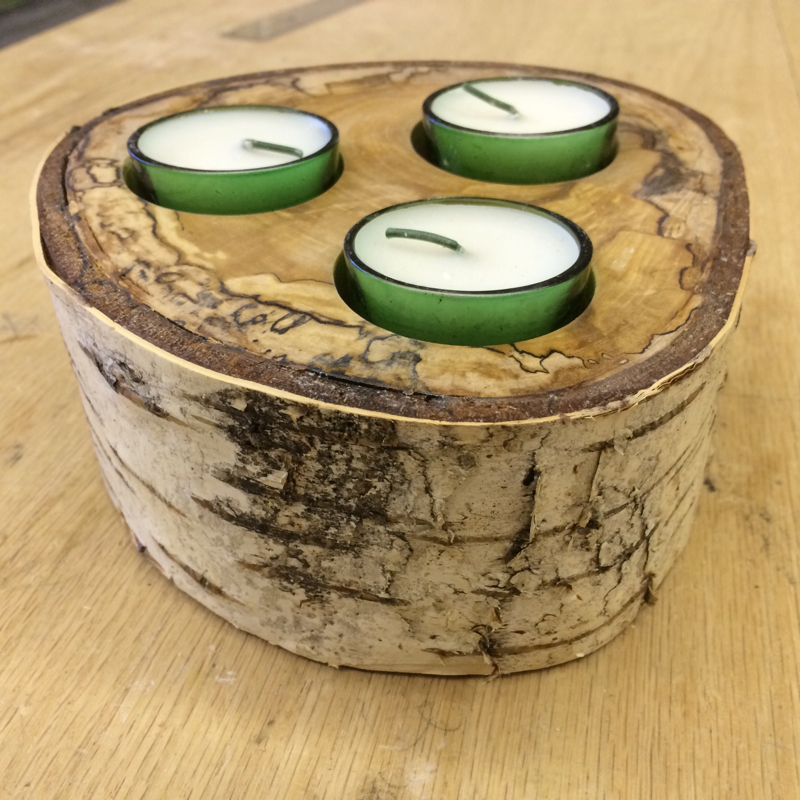
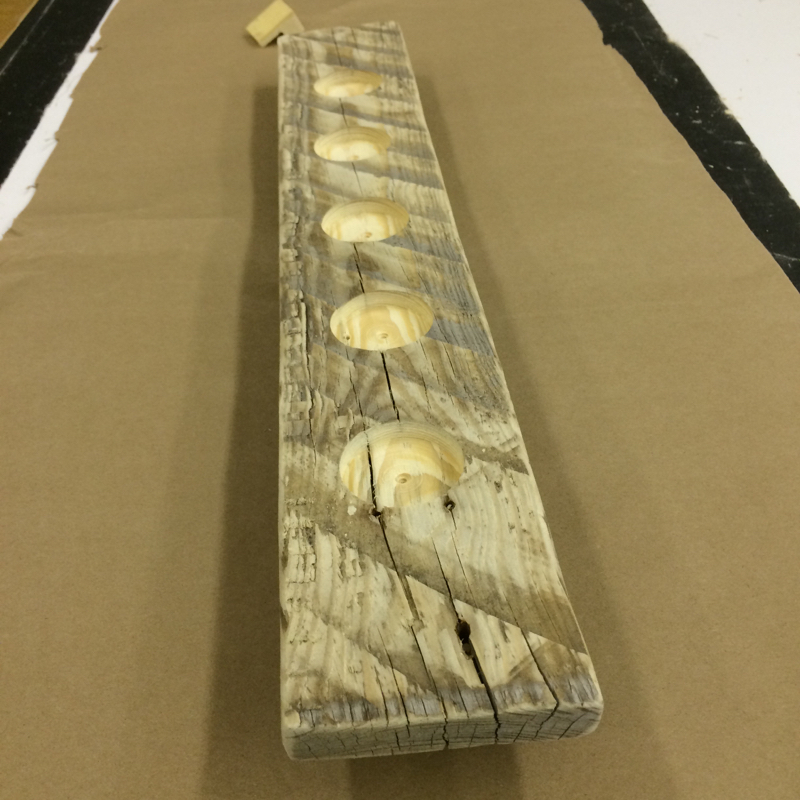
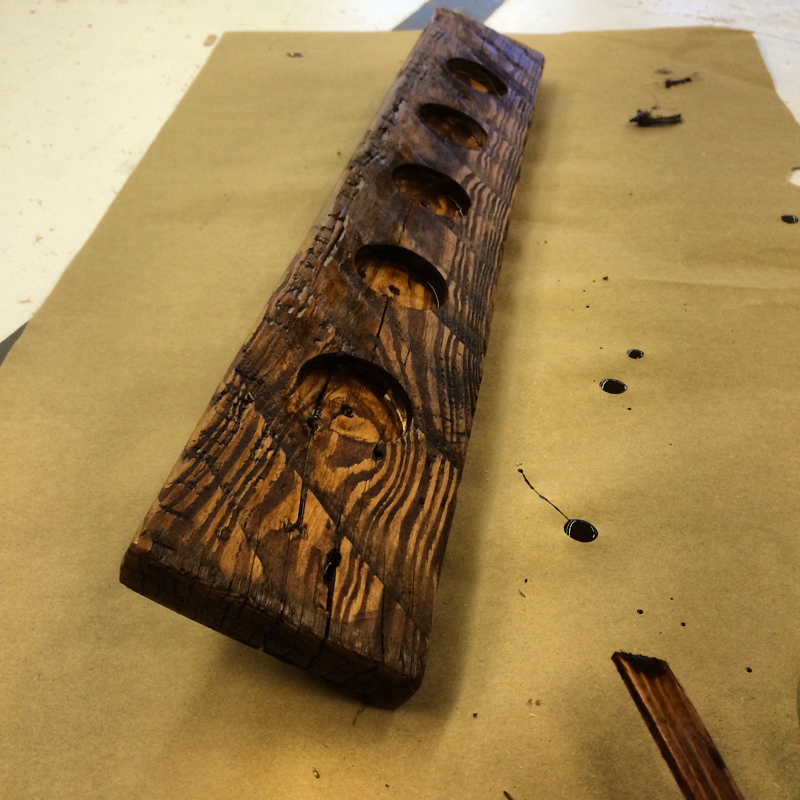
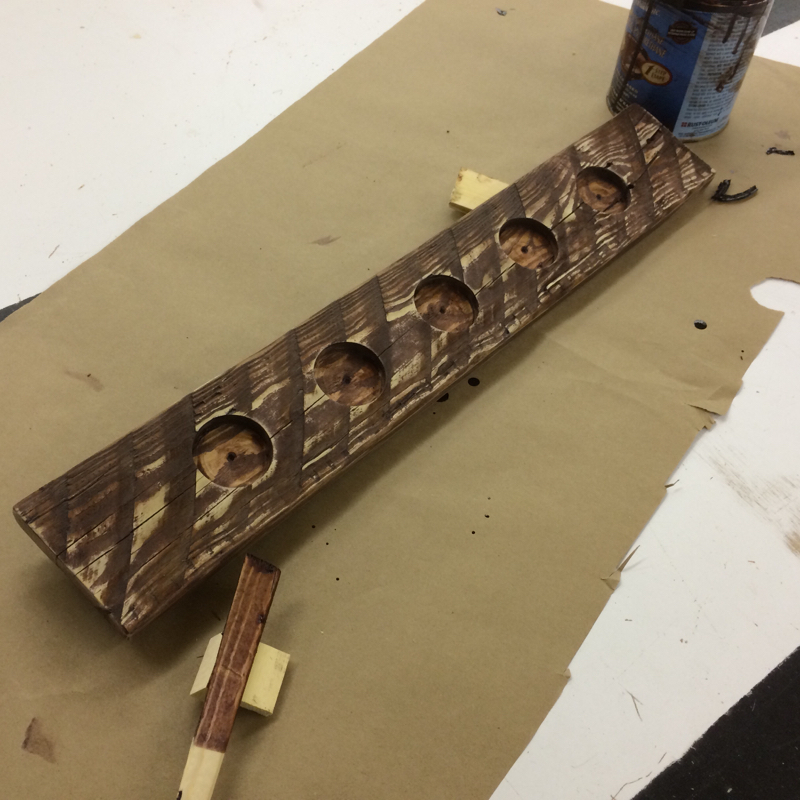
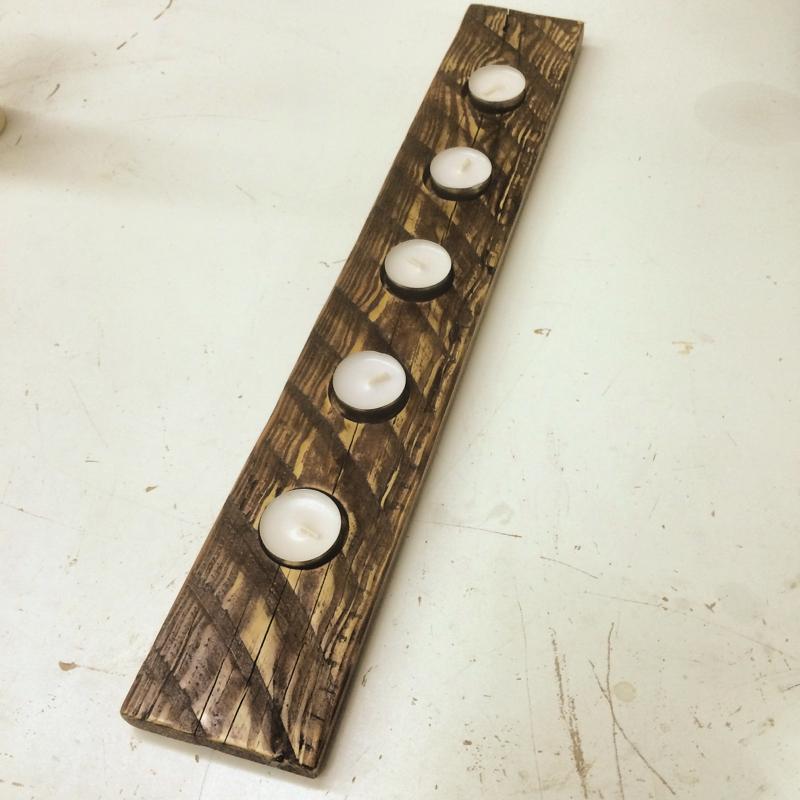
Thanks as always for checking out my work! In a business side note, www.woodprojectsbybagel.com will continue online for another year! 12/21/2014 0 Comments Rustic Pallet Wood Candle HolderHi everyone, I ordered a new tool in September that came on a really beaten up pallet. I cut it all down into different pieces that could become some really excellent looking candle holders. Here's one I made a couple of days ago after work! Happy Holidays! This is my first WoodProjectsbyBagel Christmas season thanks for the support! 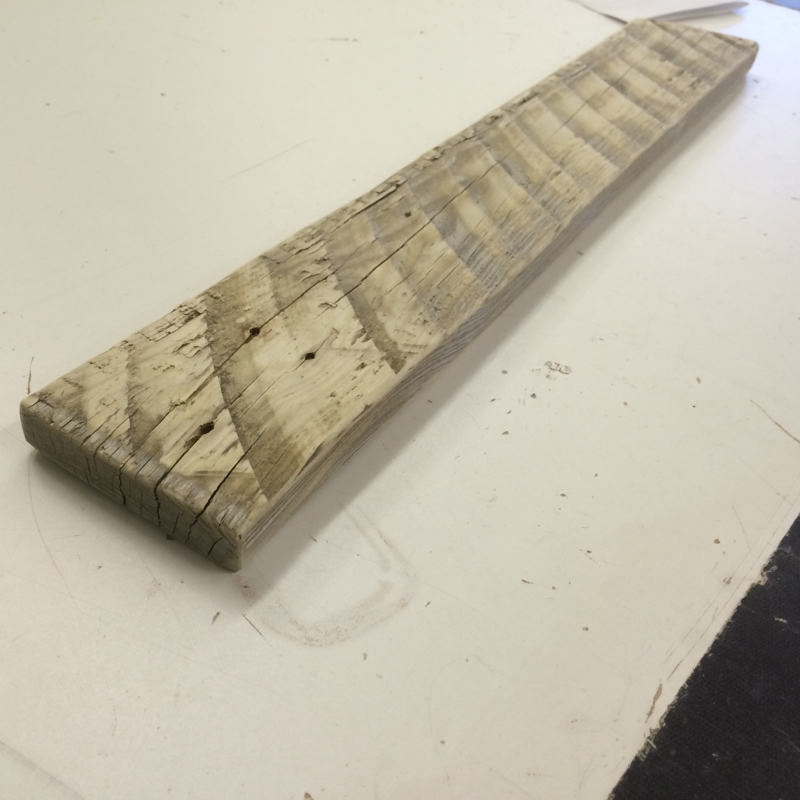
|
AuthorWelcome to WoodProjectsbyBagel! Archives
March 2018
|
 RSS Feed
